First, mouse-over any friend's name and a menu will pop-up:

Go to the "Friends" menu and down to the "Add to another list.." option.
If you don't already have any lists set up, just go to the bottom where it says "New List"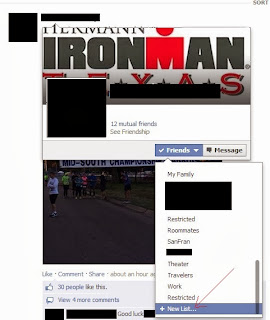
If you don't already have any lists set up, just go to the bottom where it says "New List"

Type in a name for the list.
Then you can add as many other people to that list as you need.
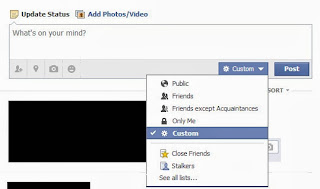
Part 2 is when you're going to create a post.
Click in the Status Update box and on the lower right corner, just to the left of the "Post" button there's a little icon that shows your current "audience." Mine always shows "Custom" as I censor most of my posts, but just click that and it brings up a drop-down menu where you can change the options.
Then you can add as many other people to that list as you need.
Part 2 is when you're going to create a post.
Click in the Status Update box and on the lower right corner, just to the left of the "Post" button there's a little icon that shows your current "audience." Mine always shows "Custom" as I censor most of my posts, but just click that and it brings up a drop-down menu where you can change the options.

Click "Custom" and that will bring up this screen:


Then just type in the list of people you do or don't want to see the related post.
Each time you change this BEFORE making a post, that setting becomes your new default. If you make a post with your default settings, then go change who it's shared with AFTERWARD, that does NOT affect your default setting. (If I want to lighten up the censorship on my posts, that's what I do, leaving the default at the level where I can post whatever I want.)
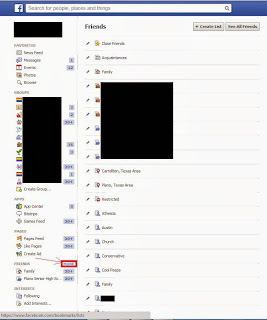
To access your lists afterward, and either add or remove people from them, go to your home screen and down in the "Friends" section of the left-hand menu:
Each time you change this BEFORE making a post, that setting becomes your new default. If you make a post with your default settings, then go change who it's shared with AFTERWARD, that does NOT affect your default setting. (If I want to lighten up the censorship on my posts, that's what I do, leaving the default at the level where I can post whatever I want.)
To access your lists afterward, and either add or remove people from them, go to your home screen and down in the "Friends" section of the left-hand menu:

Click on "Friends" (or "More") and it will bring up your lists. Click on a list and then add or remove people from there! (You can also create new lists from this screen.)
No comments:
Post a Comment